Sterilizing soil may sound like a complicated matter better left to professionals, but it’s actually a rather simple process that can be done in your own kitchen. Of course, you can always go to your local gardening center and buy sterilized soil, but for DIY fans and gardeners on a budget, at-home sterilization is the way to go.
Jump to:
Why You Should Sterilize Soil
If you’re a budget-conscious gardener who would rather reuse soil than unnecessarily spend money on new bags of soil every time you repot or buy new plants, you might want to consider sterilizing your soil from time to time.
Each time you reuse soil, you’re planting your precious succulent in soil that still contains pathogens, pests, and maybe even seeds from the last plant. As you might imagine, these contaminants will build up with each consecutive use of the soil.
You may be able to reuse soil repeatedly without any problems if you’re planting healthy mature plants, but seedlings and cuttings are particularly sensitive to soil contaminants. Rather than risk the health of your delicate succulents and cacti, sterilize that soil!
Read Article: Related Article: How to Plant a Cactus
Sterilization Temperatures
120°F/49°C kills most molds
145°F/63°C kills some fungi bacteria, pests
160°F/71°C kills all fungi bacteria pests
180°F/82°C kills weed seeds
It’s important to note that you should never heat your soil beyond 180°F. Higher temperatures can result in phytotoxicity and manganese toxicity. Organic matter like manure or compost can also become toxic. Since soil toxicity sort of defeats the purpose of sterilization, it’s best to keep your temperatures below 180°F.
Sterilizing Soil with Chemicals
Chemical sterilization is typically only used in large scale commercial agriculture, but regardless of the size of your garden, we don’t actually recommend using chemicals to sterilize your soil.
No products found.
Chemicals not only put your succulents’ health at risk but your own as well. Most sterilizing compounds have a quarantined period, which requires you to leave the soil unplanted for a certain amount of time. After that period is over, the soil is considered safe for use.
Except that many chemicals used for sterilization linger beyond this period. That means even after the quarantine period is up, you and your plants may still be exposed to dangerous substances.
Chemical-free methods of sterilization are just as effective, so why put yourself and your plants at risk?
Sterilizing Soil with the Sun
If you plan on using the sun to sterilize your soil, prepare to be patient. It can take four to six weeks to thoroughly sterilize your soil in warm, sunny weather. In cooler or cloudy conditions, it can take eight to ten weeks.
First, you’ll need a layer of plastic to spread your soil on. A tarp works well, as does any other type of thin plastic material. The size you use will be determined by how much soil you intend to sterilize.
Next, spread your soil out in a thin layer across the surface of your tarp, no more than a few inches deep. Before placing the top layer of plastic, you’ll want to mist the soil to add a bit of moisture.
Once your soil is uniformly damp, cover the soil with thin plastic. Thin clear plastic is ideal, but any will work. If possible, use sheets that are closer to 1mm thick, as they will allow an appropriate amount of sunlight through.
Thin sheets can easily be damaged by wind or wild animals, so be sure to keep an eye on them throughout the process. Thicker sheets of plastic can be used in these cases, but anything over 2mm thick should be avoided if possible.
Read Related Topic: How to Propagate a Christmas Cactus & Take Care of It?
Sterilizing Soil with Steam
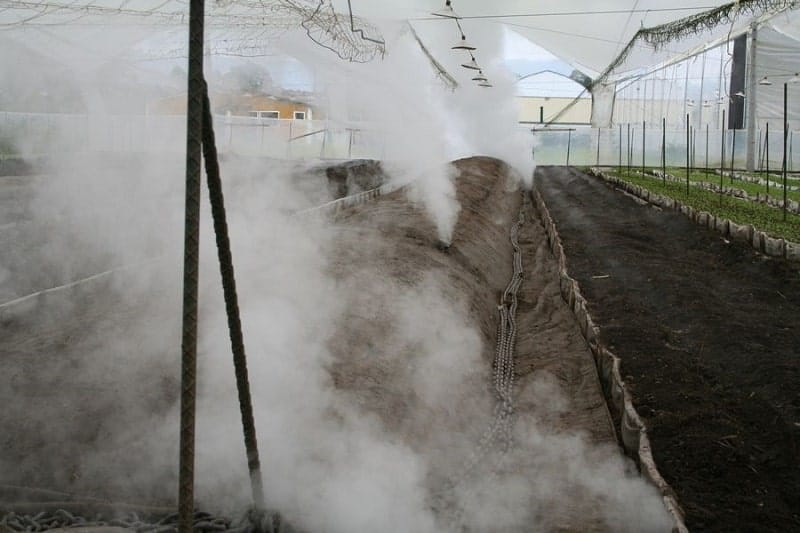
Soil can also be sterilized using steam, so get out that cooking pot or pressure cooker. When using this method, steam the soil for about 30 minutes, or until it reaches 180°F.
If you don’t have a pressure cooker, pour about an inch of water into your cooking container. You’ll then want to place your dishes of soil onto racks so that they can be reached by the steam, but not submerged in the water. Covering the containers with foil will help contain the steam, sterilizing your soil more thoroughly.
Cover the pot and boil the water for about 30 minutes. You may need to tilt the lid on your container to allow excess steam to escape.
If you do plan on using a pressure cooker, the process is similar. After placing several cups of water into the cooker, you’ll want to place your containers of soil onto racks. Covering your dishes with aluminum foil is recommended.
Most gardeners who use pressure cookers for soil sterilization recommend steaming the soil at about 10 lbs of pressure for approximately 30 minutes.
Regardless of which method you use to steam your soil, be sure to allow the soil to cool completely before handling. It will be hot! After they’ve cooled, you can either store the soil in those same containers with the foil on or pour them into clean plastic bags.
Sterilizing Soil in an Oven
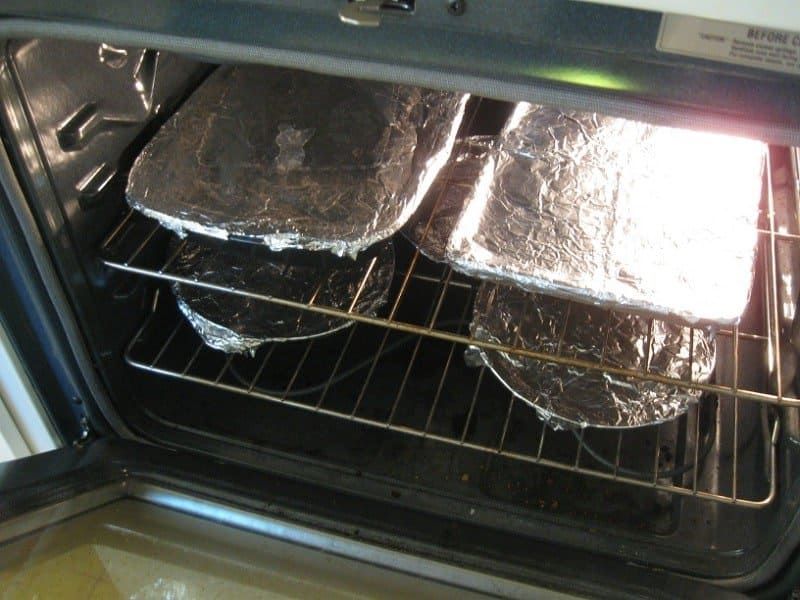
Before you use your oven to sterilize the soil, you should be aware that your house might be filled with a rather unpleasant odor. So, don’t plan on inviting guests over right after you sterilize potting mix for your new plants.
You’ll want to place your soil in oven-safe containers, a baking dish for instance, and cover it with foil. You can use either a meat or candy thermometer to heat the soil until it reaches 180°F.
Remember to let the soil cool completely before handling. Again, you can either store the sterilized soil in the baking dish with the foil on it or pour it into clean containers or bags.
Sterilizing Soil in a Microwave
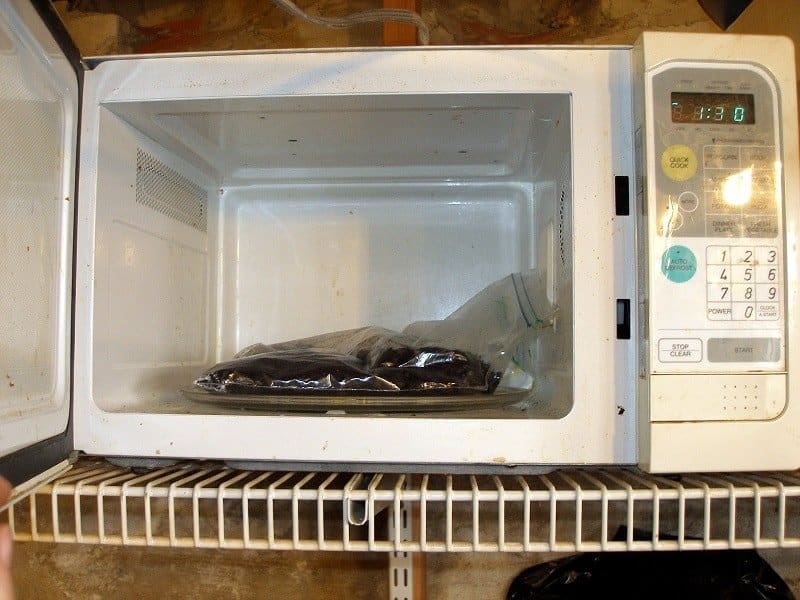
If you don’t have a ton of soil to sterilize, you can use your microwave. As with the oven method, your house may have an interesting smell afterward, so be sure to sterilize your soil the next time you have unwanted guests over.
Place damp soil into microwave-safe containers, but do not cover with aluminum foil. Instead, use microwave-safe lids or plastic wrap. Place the lids on loosely or poke a few ventilation holes into the plastic wrap to allow steam to escape.
With your microwave on full power, heat the soil for about 90 seconds for every two pounds of soil or so. Again, you can use a meat or candy thermometer to make sure the soil has reached the appropriate temperature for sterilization.
Once the soil has cooled, you can either use it right away or store it in a clean container for later use.
You Might Also Like:
Ivana Floyde
Hi I need some help. I have a echeveria Purple pearl cutting I damaged it a little but before I did the damage it was a dry cutting. Can it still root though damaged and should I use this soil called nk florist supplies potting soil 6.6 L to help grow it for the rooting process. Also can one use aquarium gravel for their plants? I'm very me so I ask you forgive me for my ignorance.