If you've found your way to this article - congratulations! You've realized that drainage holes are a crucial part of your plants' health. I applaud you for your forward thinking!
With so many objects just waiting to be made into planters, it's hard to slow down and drill drainage holes first. Fortunately, with the right tools, it's not hard to put a hole or two into a mug.
Standard drainage holes are ½" inch across. In a roughly circular planter, you will only need one hole at least ¼" in diameter. If your planter is long or oddly shaped, add holes until you're certain it has adequate drainage.

See Also: How to Water Succulents Without Drainage
Jump to:
- Necessary Tools for Drilling Drainage Holes
- 1. A Drill
- 2. Masonry Bits / Diamond Bits
- 3. Painter's Tape or Masking Tape
- How to Drill Drainage Holes in Unglazed Terracotta or Clay
- 1. Soak in water overnight
- 2. Put tape over the area you intend to drill
- 3. Drill using your masonry bit(s)
- How to Drill Holes in Glazed Terra Cotta or Clay
- 1. Put tape over the area you intend to drill
- 3. Drill using your glass/tile bit(s)
- Additional Notes:
- Bonus Video Tutorial:
Necessary Tools for Drilling Drainage Holes
1. A Drill
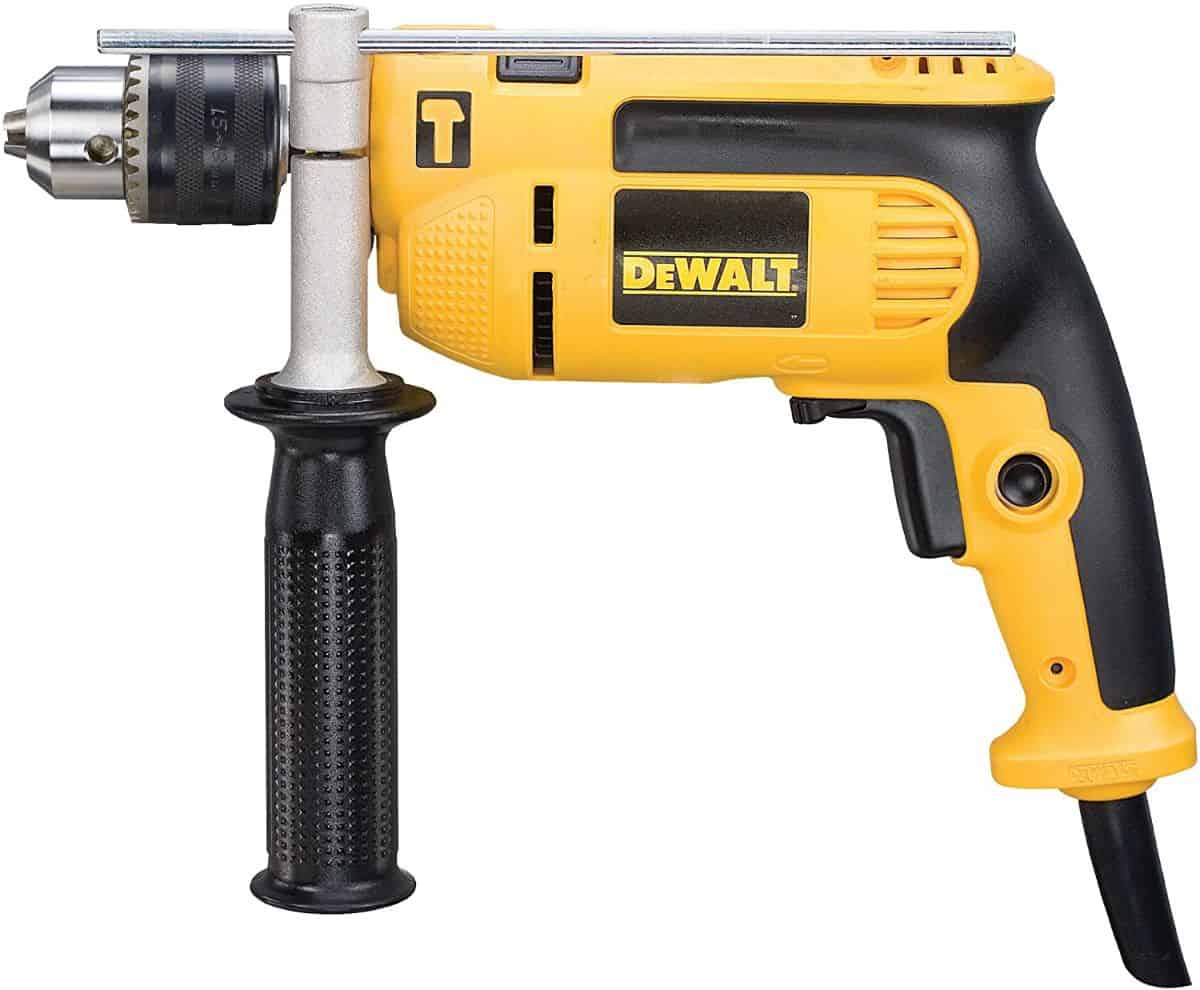
![]() You'll need a drill in order to drill. That's pretty straight-forward. Sometimes people try to put in holes with a hammer and nail, but that's a recipe for disaster. 9/10 times you will break the container you're trying to put a hole in.
You'll need a drill in order to drill. That's pretty straight-forward. Sometimes people try to put in holes with a hammer and nail, but that's a recipe for disaster. 9/10 times you will break the container you're trying to put a hole in.
Personally, I like corded drills like the one pictured. I am rarely far from an outlet. The DEWALT drill pictured here is an excellent quality drill, and easy to use for beginners (most importantly it won't break the bank). Here are more corded drills and cordless drills.
No products found.
But almost everyone already has a drill. It's an essential household tool, after all. Do you have the necessary bits, though?
2. Masonry Bits / Diamond Bits
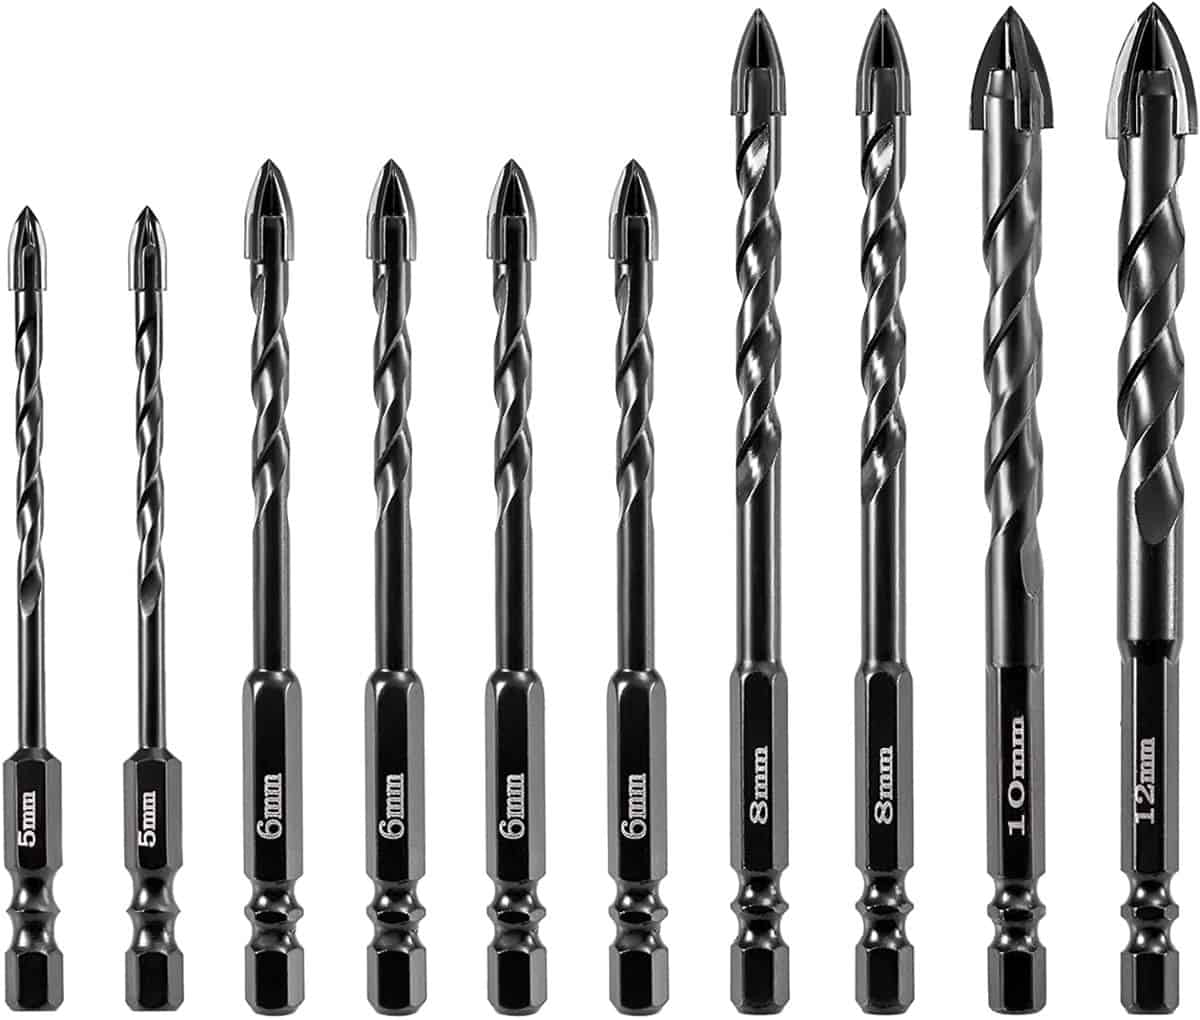
Depending on if you are trying to drill through glazed or unglazed terracotta or clay pots, you'll need to choose a specific drill bit.![]() For an unglazed pot, a simple masonry bit will do. These are common in most drill bit sets, so check if you have them. They are made with a carbide tip, so they are also called by that name as well. Depending on how meticulous you are being, you might need a set of masonry bits of increasing sizes. With these, you can drill larger holes with less chance of breaking the potential planter.
For an unglazed pot, a simple masonry bit will do. These are common in most drill bit sets, so check if you have them. They are made with a carbide tip, so they are also called by that name as well. Depending on how meticulous you are being, you might need a set of masonry bits of increasing sizes. With these, you can drill larger holes with less chance of breaking the potential planter.
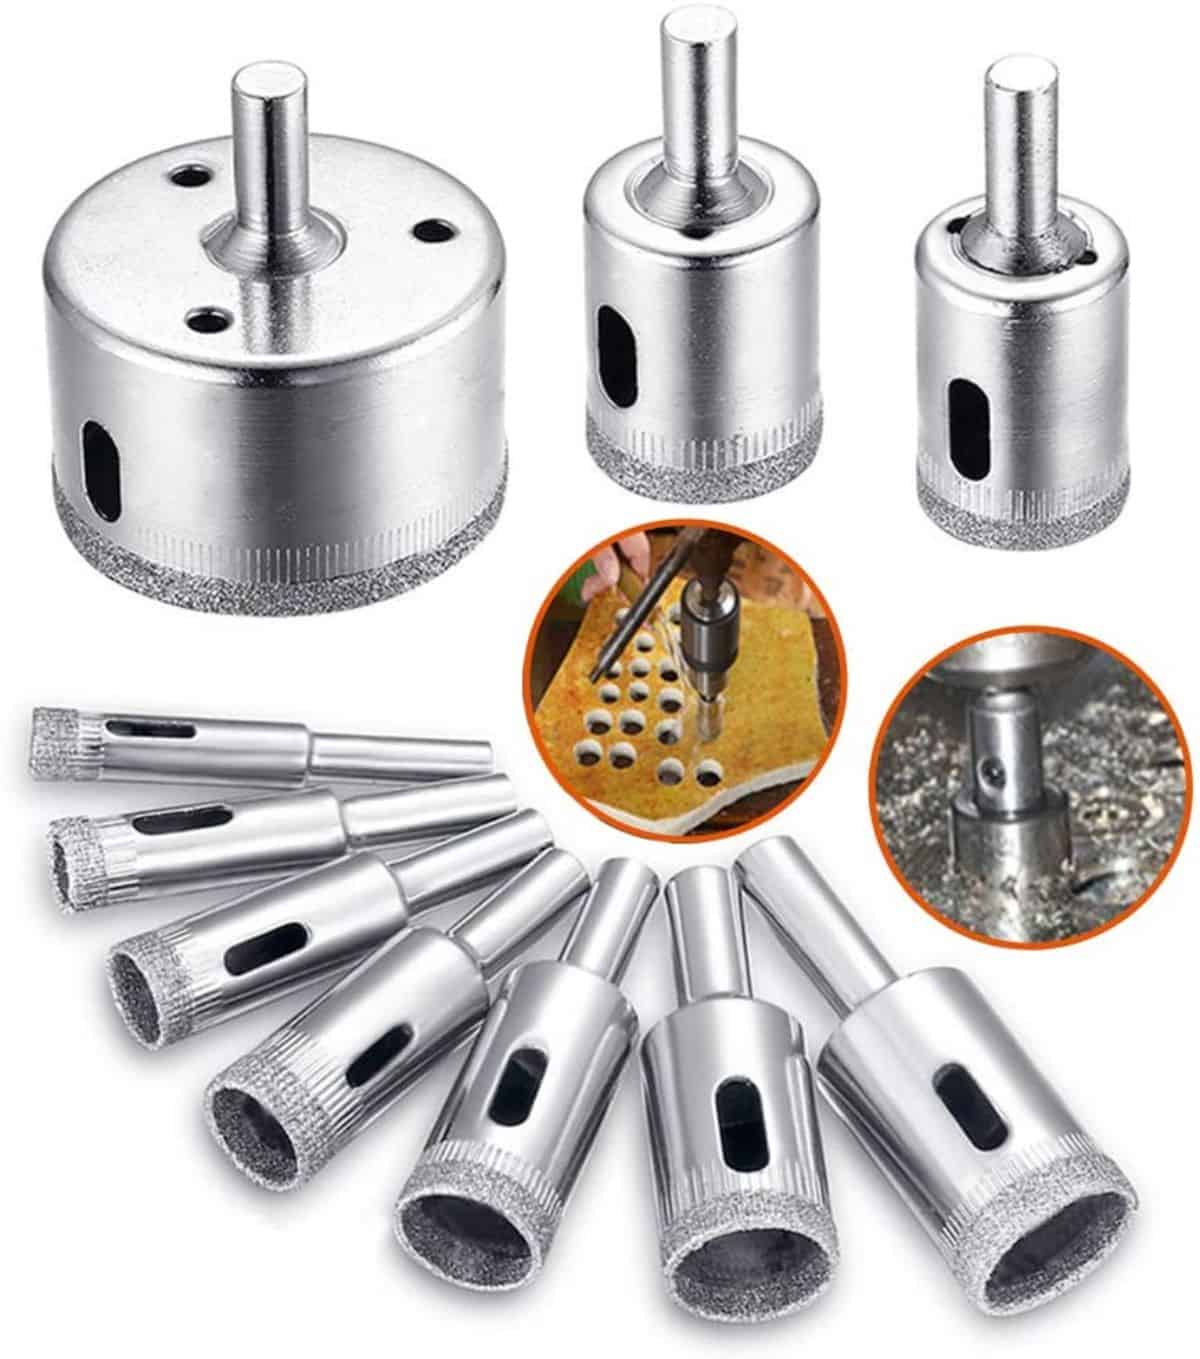
![]() If your planter is finished with glaze or something similar, you'll want to use a glass/tile drill bit. These are also often carbide-tipped, but they have a sharper, spear-like head. Instead of carbide, you may choose to use a diamond-tipped tile bit. These are a bit more expensive, but people that use them swear by them! Most diamond-tipped bits are hole-saws, which work very well. They spread the pressure out on the pot, and reduce the likelihood of shatter.
If your planter is finished with glaze or something similar, you'll want to use a glass/tile drill bit. These are also often carbide-tipped, but they have a sharper, spear-like head. Instead of carbide, you may choose to use a diamond-tipped tile bit. These are a bit more expensive, but people that use them swear by them! Most diamond-tipped bits are hole-saws, which work very well. They spread the pressure out on the pot, and reduce the likelihood of shatter.
3. Painter's Tape or Masking Tape
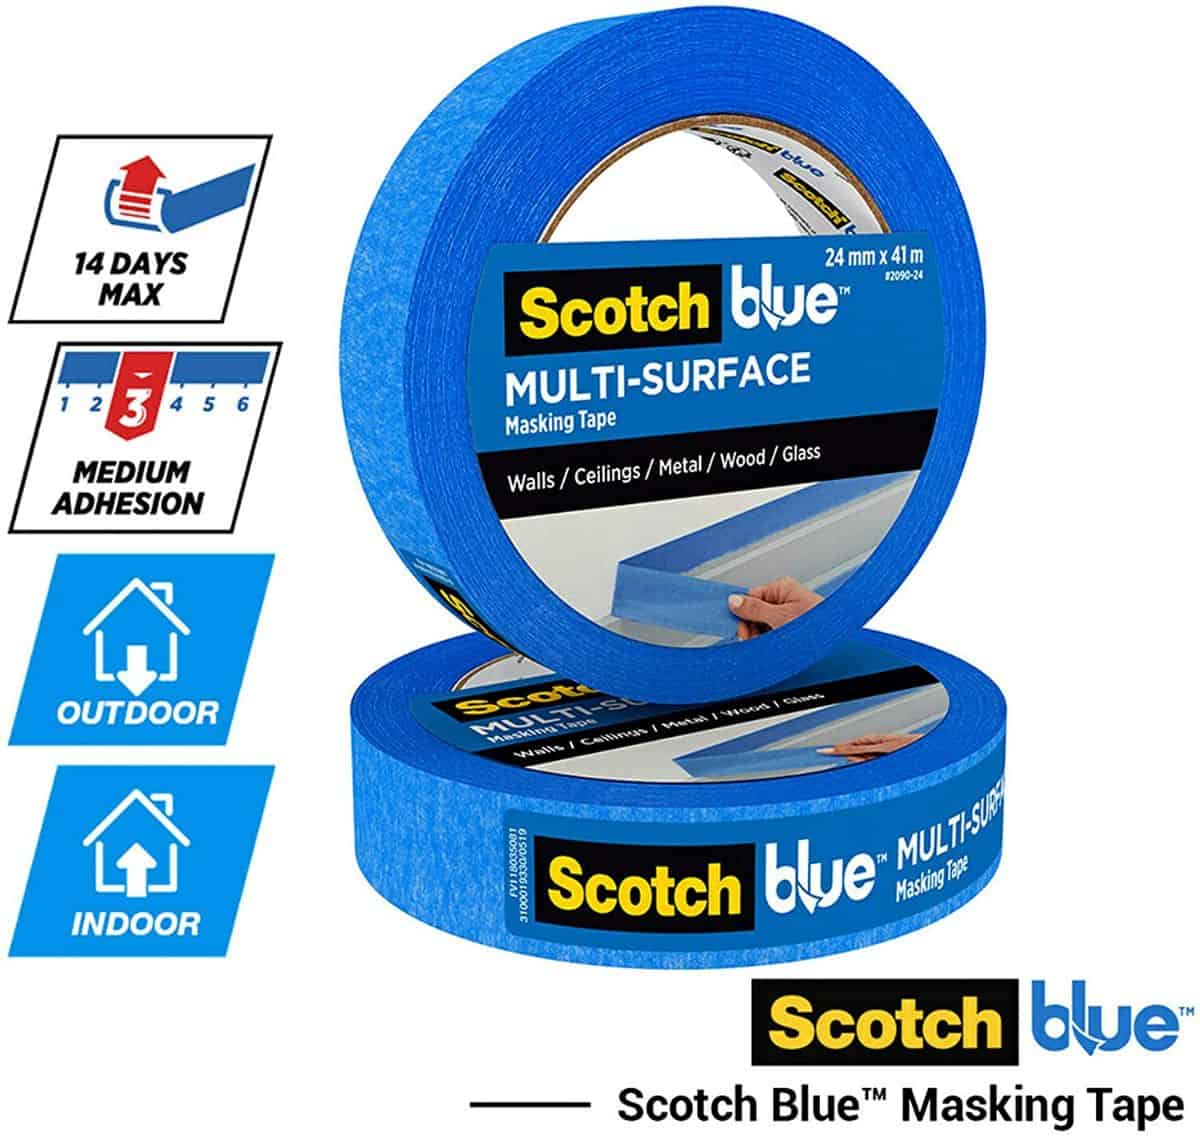
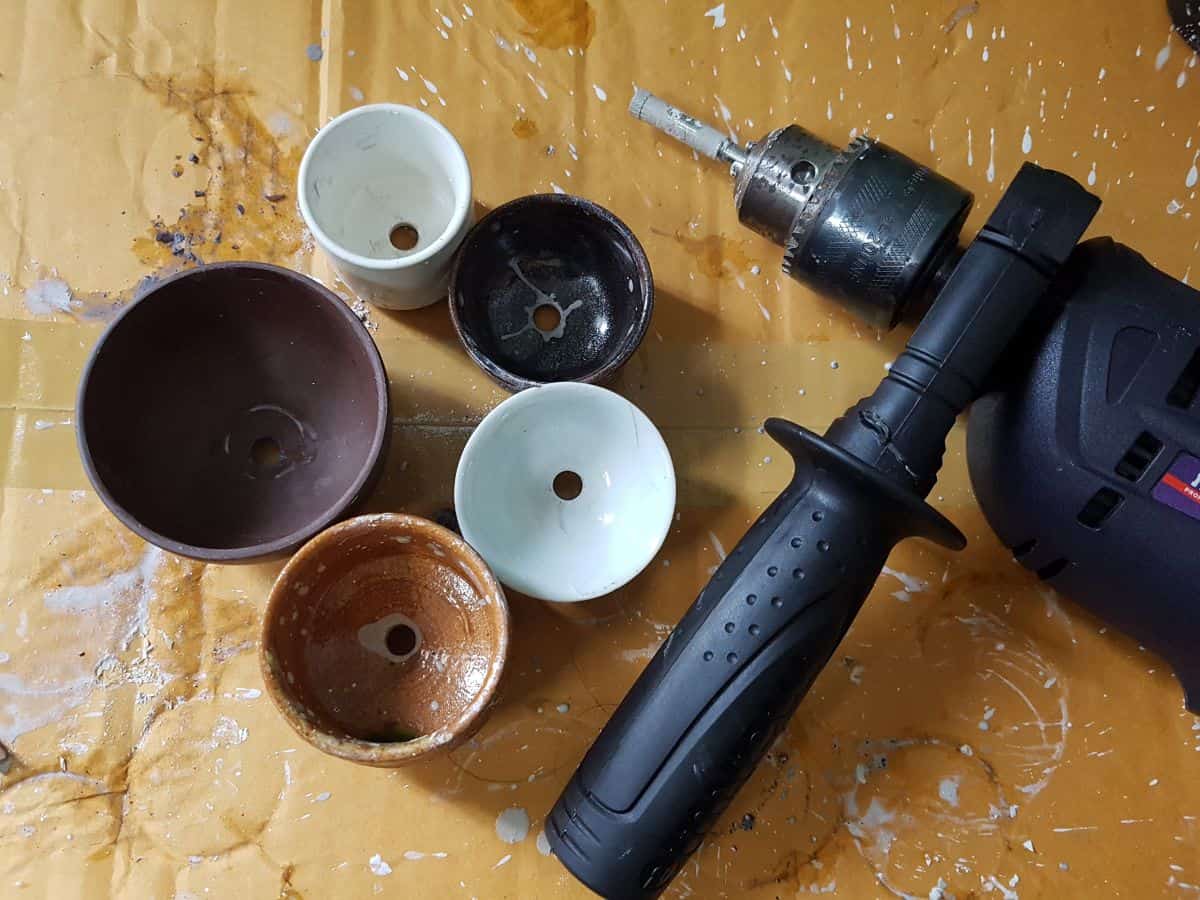
![]() I guess you don't 100% need it, but it's very helpful. It will be difficult for your drill to find purchase on pot, and painter's tape fixes that. Slipping drill bits are dangerous to you AND to whatever you're drilling, so you want to minimize that. The tape will also help prevent flaking and miniscule cracks from occurring on the surface of the pot.
I guess you don't 100% need it, but it's very helpful. It will be difficult for your drill to find purchase on pot, and painter's tape fixes that. Slipping drill bits are dangerous to you AND to whatever you're drilling, so you want to minimize that. The tape will also help prevent flaking and miniscule cracks from occurring on the surface of the pot.
How to Drill Drainage Holes in Unglazed Terracotta or Clay
1. Soak in water overnight
We've got an advantage when working with material that isn't glazed or coated - it can absorb water. Leaving it in water overnight will let it soak in some of that H20. It doesn't have to be overnight, but it should be an hour minimum. The saturated pot will be softer and less prone to breaking when you start drilling holes.
Pull the pot out when you're done and shake off excess water. Continue to the next step before it dries!
See Also: Top 40 Gardening Blogs You Need To Know About
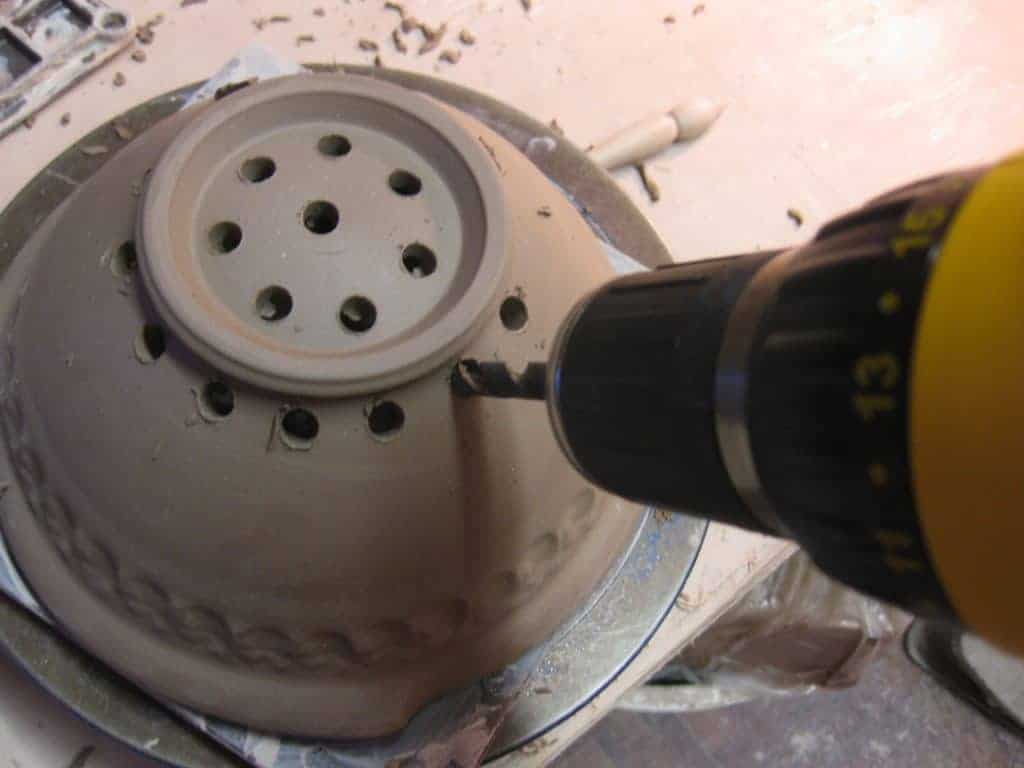
2. Put tape over the area you intend to drill
Like I said earlier, this serves two purposes: gives the drill traction and helps prevent chipping. In the interest of safety, you should probably also put on safety glasses before you start drilling. You don't want ceramic dust in your eyes.
If the pot is still wet, put a few pieces of tape on there, it'll stick eventually!
3. Drill using your masonry bit(s)
The most important thing to remember is this: do not apply pressure. You are only there to hold the drill and guide it. The drill bit will do everything as long as you keep it in contact with the surface of the pot.
If you are using a set of drill bits, start with the smallest one. Place the bit above where you want the hole to be, and pull the trigger! Start slow, but as soon as you have made that initial indent, go fast. Once you've got an indent, you don't need the tape anymore, but it's not hurting anything by remaining.
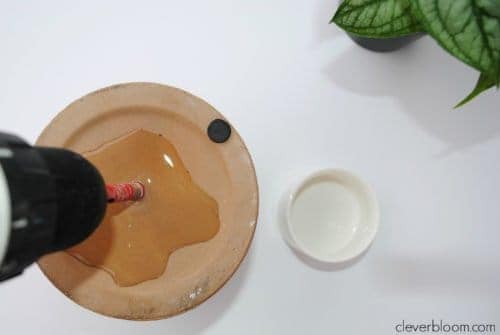
Don't try to drill through too fast. Depending on the material, it could take anywhere from a few seconds to a few minutes. Slow and steady is how you wanna play this one. If the pot is thick, pause occasionally to blow the dust out. You should also pour a bit of water in the hole when you do - it helps keep the bit cool and provides lubrication.
If you see smoke coming from the bit or the pot at any point, stop and let them cool down. Put the pot back in the water for a couple minutes. Everything is still okay at this point, but it can be dangerous if you don't pause to cool off.
Once you're through - congrats, you're in the clear. If you have a set of drill bits and would like to enlarge the hole, switch to the next size up. Repeat the process. Start slow until you've got a groove then speed it up. Never push the drill. You'll get there in no time.
How to Drill Holes in Glazed Terra Cotta or Clay
The process is very similar to unglazed, with a few notable exceptions. You don't need to soak it in water. Or, you can if you want, but it won't help. It's glazed, it doesn't absorb water. So really, you just start at step 2 (but we'll call it step one).
1. Put tape over the area you intend to drill
If you want to see that same picture of my pretty Japanese bonsai pot, you can scroll up. Otherwise, I'll assume you can imagine what tape looks like on the bottom of a pot.
The tape is more important for glazed pots though, so I wouldn't recommend skipping it. Glaze is very slippery, so tape helps a lot with that initial indentation you're trying to form. Glaze is also prone to chipping/flaking, and tape helps for that.
3. Drill using your glass/tile bit(s)
If you have multiple spearhead tips of increasing sizes, start with the smallest one. If you're using a hole-saw bit, just use whatever size you want the hole to be. There's no point in drilling increasingly bigger holes for hole-saws.
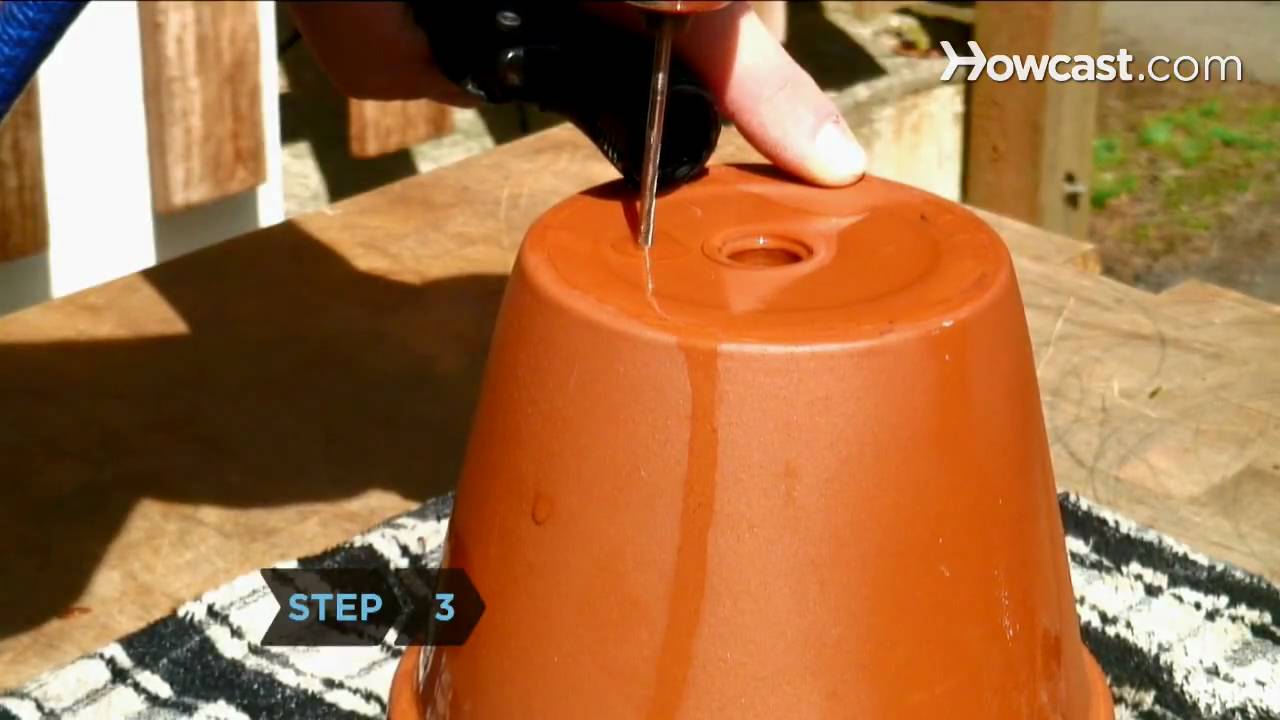
Water is a lot more important during drilling for these glazed pots than it was for the unglazed ones. We didn't get to soak these in water, so we're dealing with the full strength of the clay/terracotta. Additionally, glazed pots tend to heat up faster and that's bad for your drill bit and your pot!
To account for this, we want a constant flow of water into the hole you're drilling. It doesn't need to be a lot, it just needs to be cool and frequent. If you've got a buddy to help pour while you drill - you're in good shape. Otherwise, use a faucet or hose. You can also stop occasionally to replenish your water, that's not a problem.
Once you're through - congratulations, you did it! Clean it up, wipe away the dust and dust-water. If you need a bigger hole, switch to the next size up. Be careful of the edges of that drainage hole, they're probably a bit sharp. Sand them down, if you want.
Additional Notes:
- Some people recommend starting at an angle and moving up only once you've chipped the pot or gotten a hole going. I find this unnecessary if you use masking tape.
- Water is your friend. It will always help. Use it as often as possible.
- If your pot breaks, but hasn't fallen apart, consider sealing it with waterproof silicon sealant. I've done this before - you just slather it liberally all along the cracks. The pot hasn't fallen apart yet!
Bonus Video Tutorial:
SHERYL
Boy, did I need to read this! Thanks.
Sandi
That was extremely helpful! So glad I found this. Thank you!!
Patrick Grubbs
Glad it helped! Cheers!
Lori Bowman
I was hoping there would be a way to turn terracotta saucers into bonsai pots. Thank you so much!
Sue Palmer-Greenwood
Thank you sooooo much. So helpful xx
Paula
Worked perfectly! We had a felt pad already on the bottom (used pot inside for awhile) so didn’t need blue tape. Thank you!
Elise
I tried using a small masonry bit on a very thick (< 1") terra cotta fountain base that I want to turn into a planter. I drilled for over a minute and made absolutely no progress.Do I
need to try a diamond bit? It is extremely tough material.
Patrick Grubbs
You have to apply a fair bit of pressure to get it going. Try diamond if that doesn't work.
Jon
I used this for a glazed pot: https://www.amazon.com/gp/product/B000VR7E6U/ref=ppx_yo_dt_b_search_asin_title?ie=UTF8&psc=1
be sure to run the water so it hit not only the pot, but the opening in the bit as it's turning.
Tom
Thanks for the suggestion about water. I never thought of that.After soaking the pot it draped a hose over a chair and turned it on for just a dribble on the pot. It kept the drill cool so it kept its temper.
i was using a cordless drill. If your drill has a cord I would not advise this: electricity + water = electrocution.
Jon
Thank you for posting this! I was just going to use tape on a glazed pot, but after reading your well written instructions (and warnings about chipping/cracking) - I picked up the needed glass/tile diamond bit on Amazon. We turned it into a father son event with my 8 y/o in charge of keeping the water hose on the bit/pot while I drilled. We were both very happy with the outcome - a perfect hole, no cracks, and lots of opportunity to let him know how helpful he was and how appreciative I was for his help!
Patrick Grubbs
That sounds like a delightful time, thanks for sharing 🙂
Matt
Why not just place the pot upside down inside a 5 gallon bucket or something comparable. Fill the bucket with enough water so that the entire pot is submerged. Have someone hold the pot unless your using a drill press. It can be done. I’ve drilled holes through mason jars using this method with a diamond/carbide bit.
Sham
How to Drill Drainage Holes in Terracotta and Clay It is very important for professionals. Many of us who have been working for a long time think it is the cause of headaches. But you have presented the matter in a very beautiful way. Thank you so much for discussing the matter. Your writing form is also very beautiful. Let's write more articles on new topics.
Mohsin Kabir
I am glad to see the article. This article is very helpful. So glad I found this. Thank you!!